1. Magnets made with DSP
2. Magnets made with stamped images
3. Magnets made with Retired SU fabric
4. Magnets made with glitter
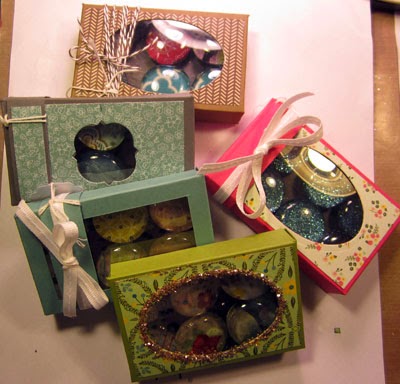
So I had all these magnets and was in a quandry as to how to package them.
Then I came up with an idea! Use the envelope punch board, made a small box, and using framelits make a see through window in the top of the box.
Here is what I came up with. A step-by-step tutorial will follow.
 "
"Supplies needed:
- Envelope punch board
- Cardstock 6 by 6" (the finished box size is 2 by 3 1/2")
- DSP 3 1/2 by 2 "
- Window sheet 3 1/8 by 2 1/8"
- Framelit of choosing
- Velcro
- Sticky strip
- Paper snips


4. Attach the DSP to the front of the cut out.


6. Window is formed.


8. Now its time to start making the box. You`ll need your paper snips for this

Now fold your box at all the score marks.
9. Apply adhesive to the right side of the tabs at the bottom and adhere them to the sides as shown below.

10. Apply sticky strip to the bottom flap and form the box. Be sure the box is square before adhering firmly.
11. This shows the back of the box with tabs and flap adhered together. At this point I add some velcro to the wrong side of the top flap. Note: both pieces of velcro are attached at this point.

Decorate the box as desired.

Supplies used:
Built for Free Using: My Stampin Blog
3 comments:
Thank you for sharing! I love the magnets are they on your site also?
Hello Maria!I love your little boxes but I've a problem:I can't have the same thing you have at the 2nd point.I must punch and score at 3" and 2" for each side of the cardstock?I try but it's wrong.I don't understand why...Thank you for your help.
Véronique
Vero: Thanks for viewing my tutorial. I think your problem might be using the envelope punch board. Punching and scoring at 2 and 3 are done only on the first side. On the remaining sides, punch and score at the score lines (not at 2 and 3)only. Try that and see if it works.
Post a Comment